The Deuce
All Tube, True Stereo, Single Cabinet
Guitar Amp with Very Well Optimized Adjustable Distortion Generation for the
Bluesman, and five tone controls per channel for optimal tone with any guitar.
35 watts rms per channel.
by Robert B. Richards, EET
copyright
(c) 2008, Robert B. Richards
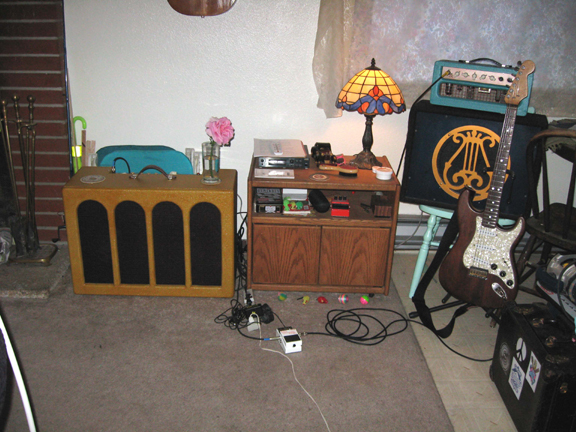
(It's the one on the left)
Intro :
For well over a decade there have been many sound effect
devices on the market that synthesize a great sounding stereo output. Reverbs,
chorussers, multi-delay pedals, etc. Most guitarists can't be bothered to drag
multiple amps into a gig to get the enveloping stereo effect created by stereo
output pedals, so we stay "traditional" - monophonic. Since the guitar
itself is likely monophonic, this stereo amp will put out the direct guitar
sound out in mono, but the digital reverb, delay taps, chorusser, phlanger,
and etc. will radiate an ambience that is stereo, and more fun to listen to.
When it comes to the question of what sound effects
an amp should have, every guitarist I know of has accumulated many footpedals
and/or bigger effects processors. They all have their favorite pedals, and don't
necessarily care if the amp cabinet has built in effects.
In effort to keep the control panel simple and intuitive, I decided that
this amp should do a more limited part of the total process very
well (tone adjustment, optional tube type distortion and be stereo), and leave
the special effects up to the external footpedals or digital processors.
This amp has a stereo preamp with five tone controls
per channel (four passive Baxandahl (after the distortion generating stage)
and a 6 position switchable high pass shelf ahead of the distortion generating
stage), an input gain, a master volume, a stereo/mono switch, a pilot light
and an On/Off switch. No other clutter on the front panel. The poweramp is 70watt
rms stereo (35wrms/ch.), and there's two 10 inch vintage reissue Jensen speaker
drivers (P10Q). I tried to make an amp that Eric Clapton
would be happy with.
This is the only all tube, true stereo guitar amp, with
very good tone controls and of truly useful power levels, that I know of. And
it's all in a vintage tweed style cabinet that is about the size of a Fender
Twinamp or Twin Reverb. The slightly angled speaker driver
panels give a decent stereo effect at a distance, without being so angled
as to cause a dead zone of high frequencies at a larger distance. The amount
of angle is opimized for roughly 10 feet to 50 feet, rather than just up close.
More
Features:
Although it goes
quite loud clean, the Master volume control makes it possible to get tube type
distortion at lower acoustic levels. Harmonic distortion spectrum shape and
intermodulation distortion is optimized throughout, and choice of speaker driver
was very specific for several reasons.
This is a no feedback
design in both the preamp and poweramp sections, so well voiced distortion is
there, and it's not getting fucked up by feedback, which can cause excessive
distortion that is not pleasnatly harmonically related to the fundamental frequency
content.
The very slightly
outward angled speaker panels create a better sense of stereo spread when you're
back 10 feet or more, without the cabinet getting bulky and awkward to carry.
Cabinet Construction:
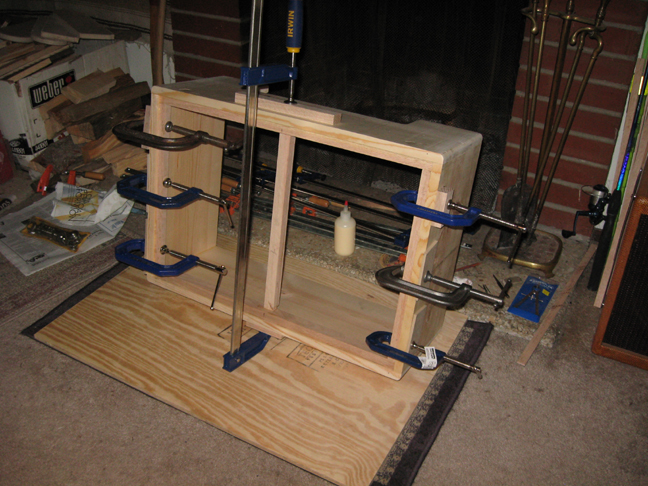
Shell is solid pine, all bracing is
oak.
The shell of the amp Eric Clapton has
been using for the last 20+ years, (1957 Fender Twinamp) is also solid pine.
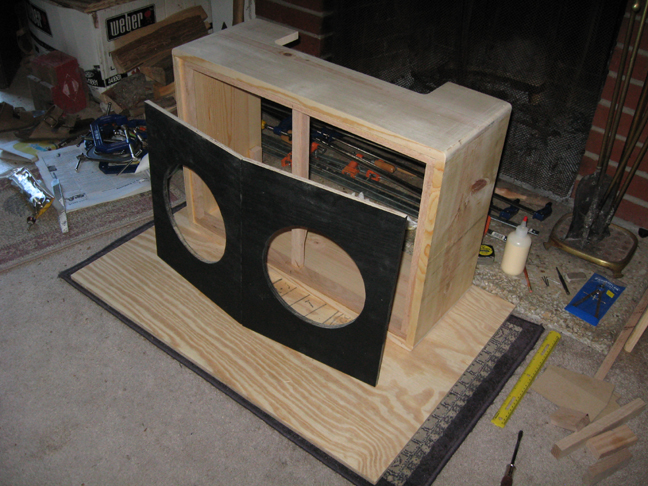
Speaker panels are half inch plywood,
to minimize weight and have good strength and not be at all warped. Any warp
at all can cause voice coil rub.
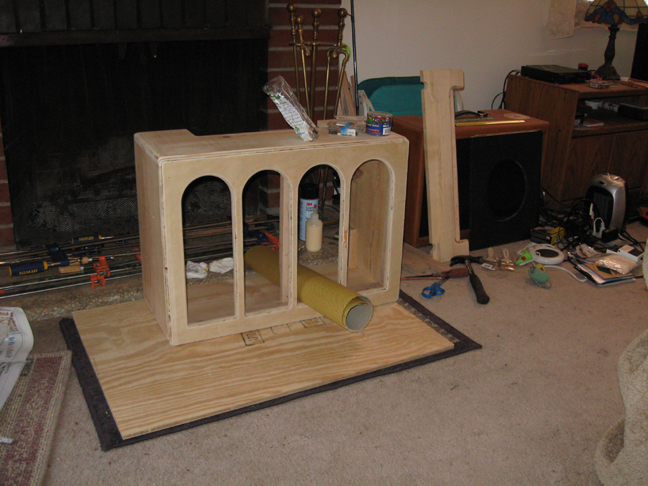
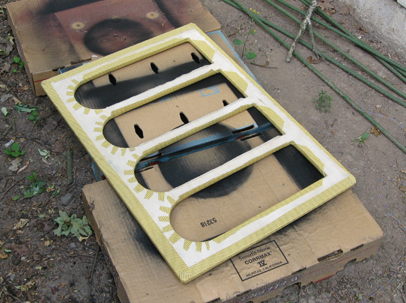
The decorative grill frame (above) is
3/4 inch plywood.
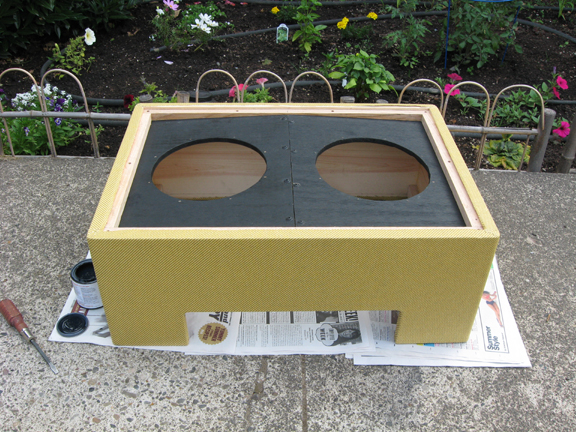
Tweeding the front.
The tweeding is all done with a glue
very similar to contact cement.
The Stereo Poweramp:
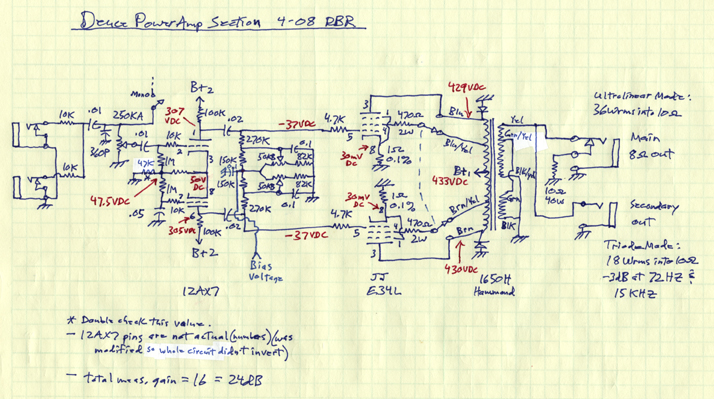
I tried to keep it simple for the sake
of reliability. Since there's no negative feedback, I needed fewer stages.
I later replaced the output transformers
and got rid of the Pentode/Triode switch to reduce overall weight.
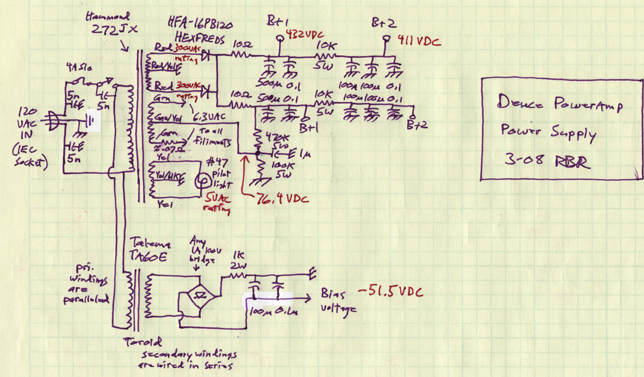
I added a separate power supply for bias
on the E34Ls. Otherwise I'd have to derive the approximately 20 volts bias (subtract)
from the B+, which would reduce the final power out substantially (voltage is
a squard term in the power formula). You want any amp circuit to see pretty
close to zero ohms from DC to infra-red, when it looks at the power supply,
so it's frequency response at the speaker is somewhat consistant and predictable
(this would substantially affect phase margin if it were a feedback circuit).
I don't recommend chokes. They were useful back in the days when the biggest
cap you could get was 25-50 uF. Now two 500uF J.J.
brand (or equiv.) electrolytics with about 20 ohms between them and a 0.1 polypropylene
across them makes more sense to me (guess I need to update this schemo a bit).
If you use chokes and caps, you are creating a 2 pole filter. If you don't know
what you are doing with multi-pole filters, you could be creating a resonant
circuit. Something that rings significantly every time a rectifier diode switches
on or off - which they do 120 times a second. This can also be an isssue when
turning the amp on or off. Plus, chokes add significant weight. Caps weigh almost
nothing in comparison.
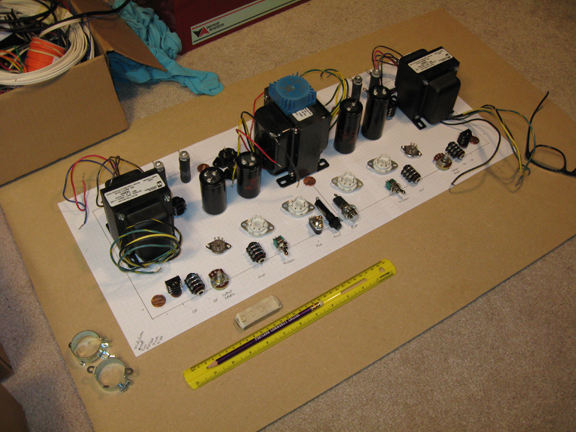
It's definately worth the time to lay
everything out and see what fits where.
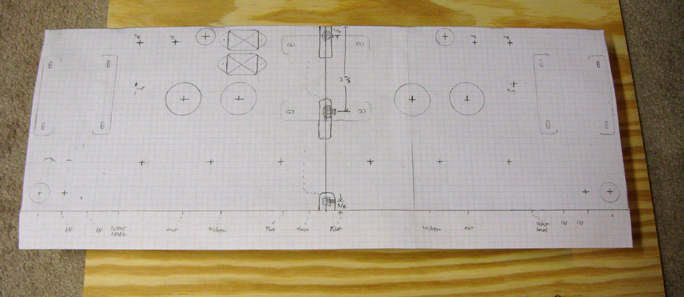
There's usually only barely enough room
in most places, to fit what you probably want to have. Layout is important.
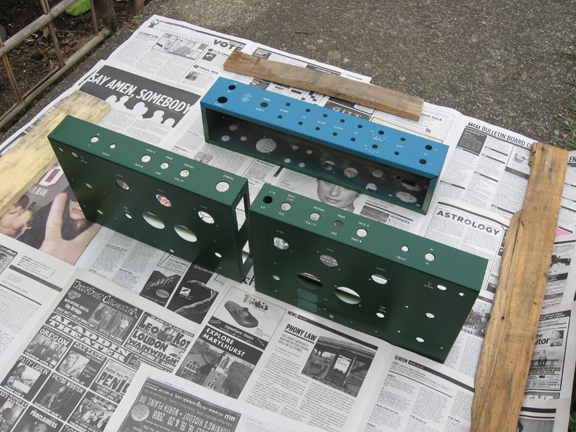
I used all white dry-transfer lettering
for the nomenclature. Fabricating, painting and lettering the chassis is a lot
of work. I always put at least two coats of satin clear over the lettering.
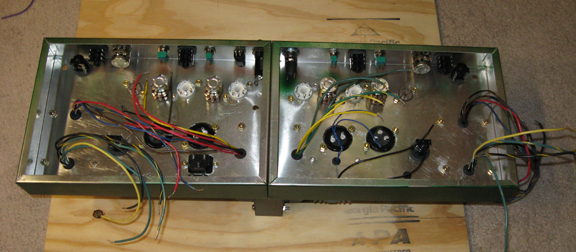
Oh
shit, now I gotta wire the dam thing...
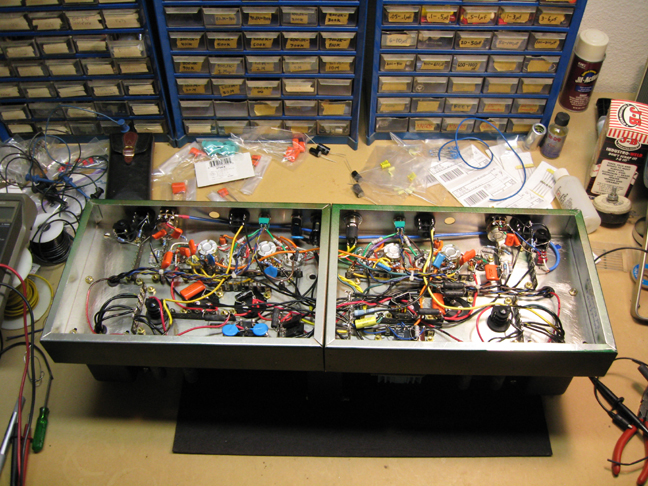
I couldn't find a chassis that was a reasonable
size and shape, so I bolted two 8 X 12 X 2 inch Hammond chassis together. I
cut two big holes on the mating surfaces with a saber saw, so power and ground
wires could go where they need to. Three large bolts hold them together on the
common surface, and the power transformer stradles the two chassis, thereby
adding more strength.
What isn't obvious is the 25 black wires
returning to the ground star center lugstrip. It's near the lower-middle area.
You want to have a separate ground wire returning to the star center for each
section of circuitry to avoid potential feedback through the powersupply wiring
which could cause hum or oscillation, and have the star center generally near
the main 500uF filter cap(s), not in the direct charging current path for the
big filter caps (take a tap from there to what you will use as the actual star
center "signal ground" bolt). Avoid having the star center ground
very near where the third prong of the AC plug (the earth ground pin) ties to
the chassis. This made a significant difference in hum level in one amp I built.
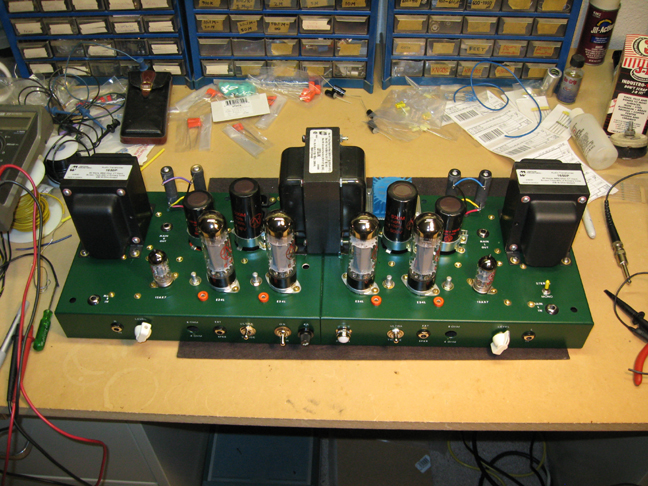
The orange things in the above photo are
bias testpoints for the output tubes. There's a ground testpoint too (black),
but you can't see it in the photo. Each tube has it's own bias pot right next
to it. If you disconnect the speaker cables while the amp is in use, the built
in load resistors automatically switch in, to protect the circuit from potential
self destruction (but don't ever do that - this isn't completely foolproof).
I added a Stereo/Mono switch in the lower right corner of the poweramp chassis,
not sure why. It's redundant and should be left set to stereo.
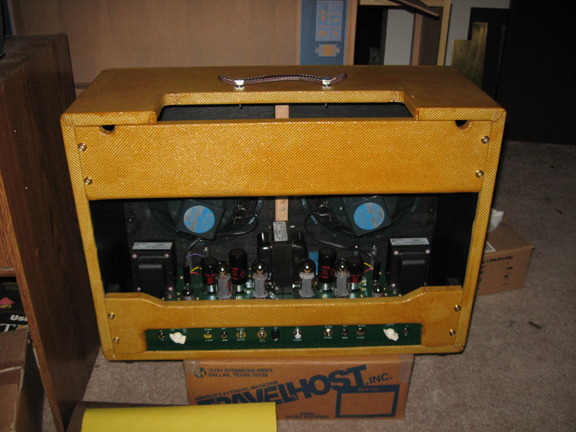
Waiting for the preamp chassis to be
completed and installed.
The Stereo Preamp Circuit :
This is where most of the magic happens.
I wanted to have the 6 position highpass switch ahead of the 12AX7 distortion
stage so I could vary the charactor or frequency balance of the distortion,
and then have the regular tone controls after the distorter in case I want to
roll off the higher order distortion products, create more of a reverse fletcher
munson curve or just deal with whatever peculiarities a given instrument might
have. The JJ brand EF86 turned in a whopping high gain of 237, I double checked
it. I chose to go big on the cathode bypass cap so sub-harmonics and I.M. difference
products could effectively modulate the distortion generation in the next stage.
The 1 meg resistor feeding the Input Gain pot is so the range of the pot is
how I like it. The control will be at about its mid position when the distortion
is just getting thick with a normal Stratocaster guitar. It also reduces I.M.
distortion in the front end (EF86)by lightening the load on it. Some I.M. can
be good, too much is not good. I wanted a good clean sound option too. The EF86
front end pentode gave me more gain than I wanted, but pentodes may have slightly
more desirable dynamic charactoristics.
The transition into distortion is pretty
gradual, which is a big part of what tubes are all about. I like the way it
sounds. The passive tone sections have about a 12 dB loss per. The 12AX7 gain/buffer
distortion generating stage has a measured gain of 71 or 37dB. The final output
buffer is a self biased cathode follower topology, which will have less distortion
than the direct coupled type in the 12AX7 stage. I used 6SN7 octal tubes for
the tone buffer and output buffer because 6SN7's are very linear so don't mess
things up. They have been worshipped by certain hard core audiophiles for the
pleasantness of their sound. They also provide a lower output impedance. 12AU7's
might have been fine here. Later on I decided to delete the footswitch control
of the extra preamp outputs, since I really don't use that function.
Although as shown, the circuit sounds pretty
darn good, there were some final tweaks done to the distortion section
(the 12AX7) that changed the nature of the distortion a tiny bit (I'm picky).
The actual values and topology are very similar to the 1959 Fender Bassman.
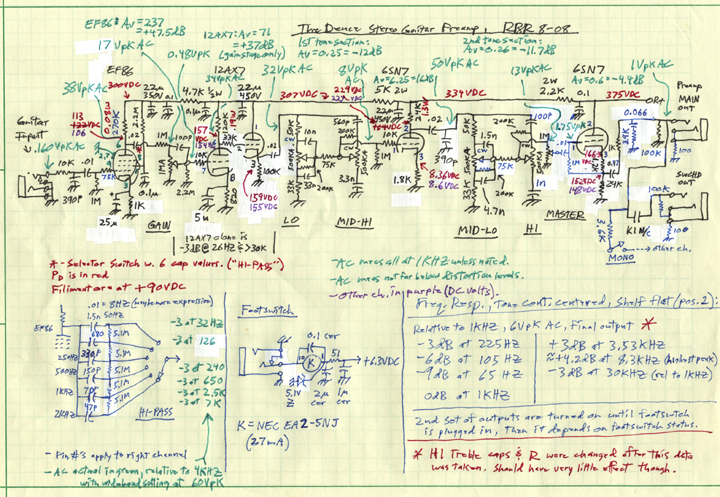
I let the preamp have it's own power
supply, part to minimize hum, and part because none of the affordable power
transformers had high enough current ratings for the filiment windings.
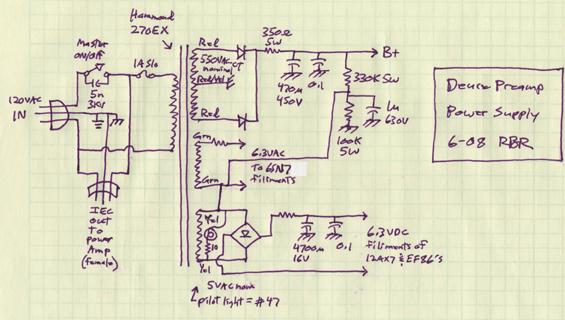
I've actually changed the B+ filter cap
arrangement since I drew this. Now I have two 100uF caps in place of the one
470uF cap, with about a 200 ohm 5W resistor between them. Front end tubes have
DC on their filiments (for minimal hum). The 6SN7's have AC on their filiments.
How I grounded the star center of the circuit to the chassis (in each chassis),
and where I tied the green wire (earth ground) to the chassis made a big difference
in hum level. That's something that doesn't show on a schematic. You need a
Ouija Board to get that right.
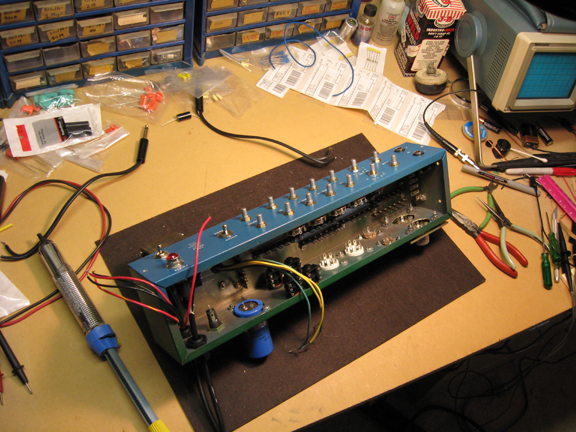
Oh
shit... now I've gotta wire the dam thing...
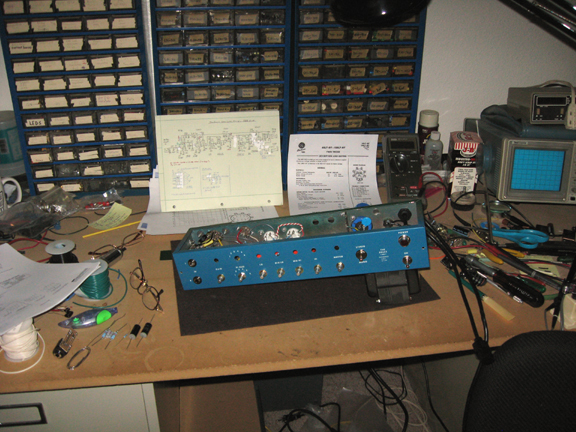
Parts on the left, tools on the right.
I had to remove all the pots and rotary switch from the one channel in order
to wire the first channel. It's pretty tight in there (4 X 3 X 17 inch Hammond
chassis).
You want to fully test
the first channel before you wire the second channel. Changing parts later in
such a tight space is possible but difficult.
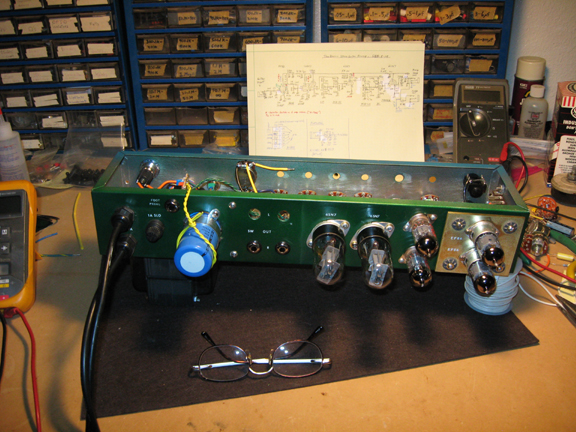
Below is part density before adding the
2nd channel tone circuit components and wiring.
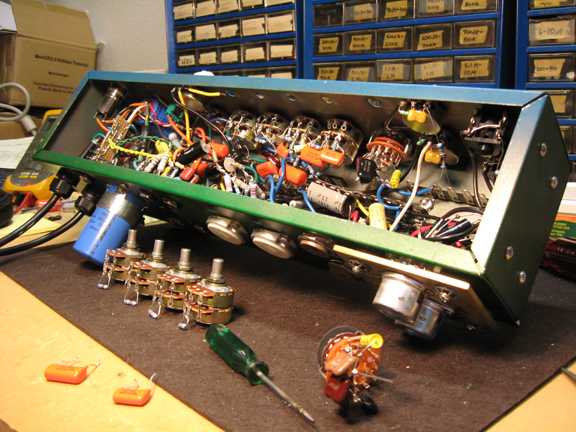
I guess I like challenges.
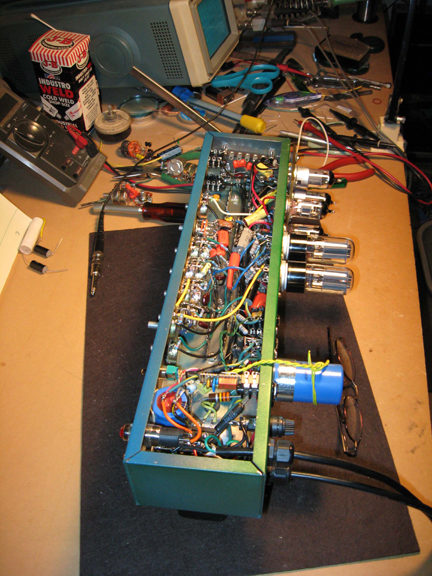
Below it's all done - both channels.
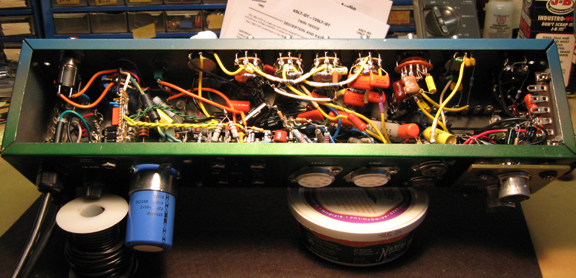
I didn't want to cut corners on the tone
control circuitry.
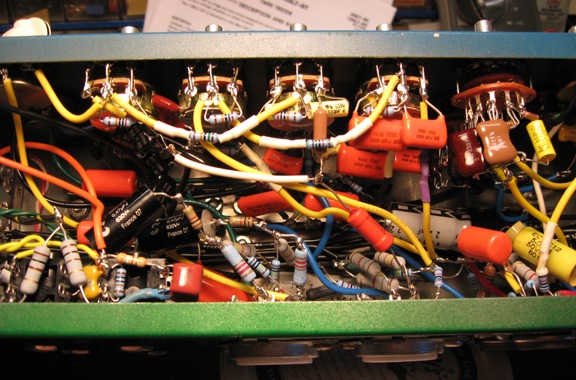
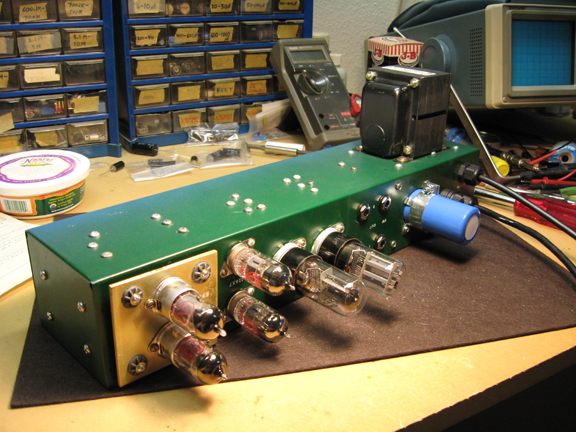
I almost forgot to ground my pentode brass
shock-plate. When it wasn't grounded, touching it would cause a small but noticable
increase in hum. The shock plate, made of heavy 1/8 inch thick brass on very
fancy soft rubber grommets, keeps the amp from getting microphonic feedback
when the gain is set to maximum (it actually works too).
It was pointed out to me that you
don't want to use tube shield covers on the somewhat microphonic front
end pentodes because the spring inside of them will resonate when stimulated
physically by the speakers, potentially adding that ringing into the signal
path. The EF806S (J.J.'s version of the EF86) which I'm using, already has an
internal shield. I think the shield compatible sockets
are nice though since they shield the pin area of the tube better (not really
an issue).
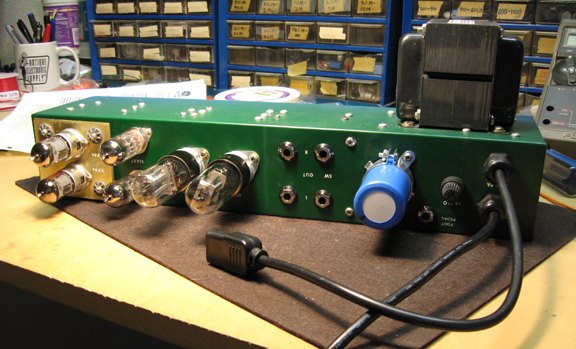
Above, the IEC AC connector on the short
cord is for the poweramp. That way you can have the ON/OFF switch on the preamp
turn on and off both the preamp and the poweramp simultaneously.
Preamp Waveforms and discussion:
Below is the EF86 being slightly overdriven.
Very smooth asymetric distortion .
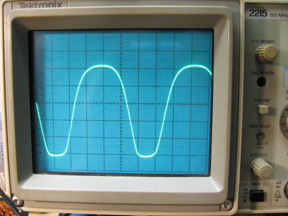
This particular distortion is not likely
to happen much without an external gain pedal, which might be a nice addition
later. The Input Gain pot being right after this stage makes that possible.
Because of the way the screen grid of the pentode is wired, there is some modulation
of the attack and decay, which I believe is an important part of the sound.
Tone burst tests will show this. I haven't gotten around to taking pictures
of this yet.
After the EF86 pentode, hi-pass shelf switch
and input Gain control, the signal goes to the 12AX7 distortion generating stage.
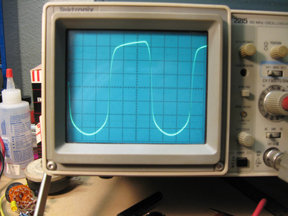
Below is the 12AX7 "Full-Wave Saturator"
circuit distortion waveforms:
To my knowledge, the 12AX7 gain stage direct
coupled to a follower buffer was first used in the 2nd or 3rd Fender Twinamp
(the '57 e-type, for example, which appears to be Eric Clapton's favorite these
days), and in most of the early Bassman circuits (the '59 for ex.). Certain
other Fenders as well, but not all. Twin Reverbs and most Bandmasters didn't
have this. Showman's either. It's arguable that any "blues" amp should
have this, regardless of what else it has. It distorts gradually and sounds
good (not recommended for Hi-Fi). I call it a "full wave saturator"
because both half cycles get clipped by a tube saturating, even though the positive
half cycle saturation happens indirectly.
Left photo is 12AX7 gain stage plate just
short of clipping, right is same just in clipping.
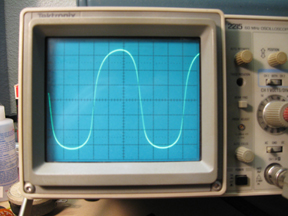
Below left is the follower output when
it just starts to have the "flat spot" on the negative half cycle.
Middle is with a little more input drive. Right is same with even more drive.
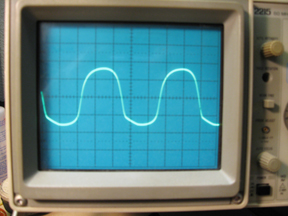
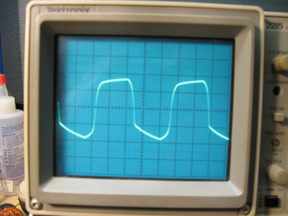
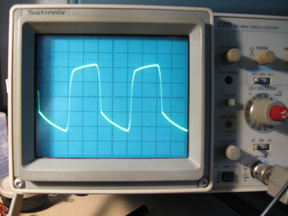
The follower starts distorting noticeably
before the gain stage would actually clip. The positive half cycle gets lopped
off when the direct coupled follower starts drawing grid current, and the negative
half cycle gets the flat spot when driving a load that is even slightly capacitive
(30Kohm in series and .01uF to ground), such as a tone control circuit.
Pink Noise Tests:
The test setup:
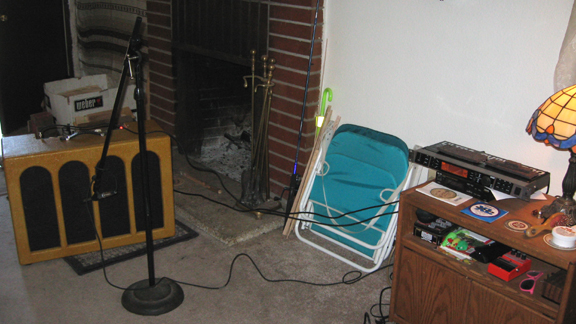
Not an ideal setup at all (my living room
is not a very good Anechoic Chamber), but maybe revealing enough if you know
how to interpret the results.
So you get the preamp to look good on the
bench, waveforms and such, but what does this "e-phase" version sound
like in use, and how does it measure acoustically with pink noise and a calibrated
mic?
I usually have my amp about a foot out
from a wall, since my place is small and it's in the way anywhere else. To see
how many of the frequency response anomolies are primarily a function of the
acoustics created by the wall, I then pulled the amp out and rotated it so there's
no wall near its rear or front, and mic'd it far and close. I was hearing the
possibly resonant peak around 1kHZ, and it was bugging me when I played either
my metal string acoustic (Taylor) or my Strat. I wanted to measure just how
much of it was my room and how much was the amp. The wavelength of about 1kHZ
is about 1 foot, so maybe putting some acoustic absorbtive material inside the
cabinet would take the hurt out of that some.

Tone controls all centered, shelf off,
close mic'd, minimal walls.
This is not a perfect test setup (Behringer
Ultra-Curve Pro RTA and Pink noise with Behringer cal'd mic on stand), but close
enough if you know how to interpret the results in my opinion and pretty important
(much better than nothing).

All tone controls at minimum position.

All tone controls at max position.
The speaker drivers I used are the 40 watt
version of the Jensen vintage reissue P10R, called the P10Q. I wanted to have
the sound be as close to the P10R as I could, since I loved how they sounded
in another amp I built. The Jensen 100watt Neodymium driver didn't sound nearly
as good (very poor high frequency extension - very "honky" sounding).
I tried those, and then sent them back. I really like the sound of the P10Q.
It pretty much has the same high end extension of the P10R, with a more practical
power rating.
After Acoustic Padding is added:
I've glued some 1/4 inch thick wool felt
to the inside of the cabinet wherever there was a place to put it, in the top
area and sides. I wanted to be relatively thorough so I might learn something
from it. After playing for a whilewith all tone controls midranged, I turned
up the lower midrange tone control to where I know it to be mostly flat with
the calibrated mic and pink noise (3 o'clock). I played it like that for a while
as well. Playing my strat through it with the insulation, it sounds very good
to my ear. Although the difference is small, and generally doesn't show up on
the very improperly done calibrated mic tests, I think it helped some but not
a big change. Here's some pics:
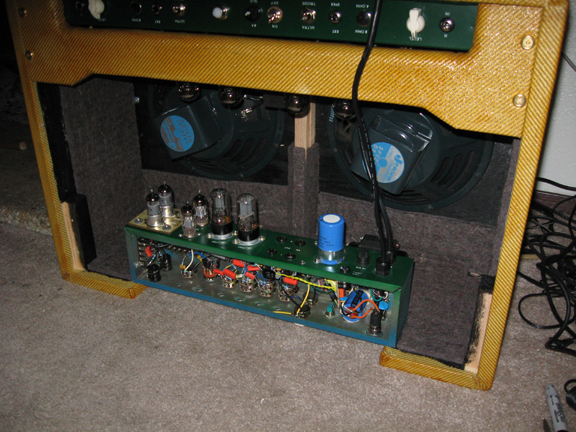
The added insulation (the amp is upside
down). The poweramp covers pretty much the whole bottom, so no insulation there.
 With
With
Close mic'd, tone controls all centered,
cabinet away from wall with insulation (above). The 170HZ peak is probably about
the room (due to the wavelength (about 7ft.) and absence in other graphs), rather
than the amp.
 Without
Same thing but no insulation. I'd only
trust this graph comparison in the mid frequencies due to variations in the
angle of the amp in the room and exact location of the mic relative to the speaker.
From say 300HZ - 4kHZ maybe. Not a big difference, but I think I hear a significant
difference when playing through it. I'm pretty sure I like it better with the
insulation. It may have lowered the Q on whatever resonances there are in the
cabinet, that might have been active around 400HZ - 7kHZ. I mention those frequencies
because they are the ones who's wavelengths fits inside the cabinet dimensions
in various ways, and can therefore resonate.

As above but amp near wall; about a foot
out, mic at about 5 ft. Carpeted floor.
I would think it could still benifit from
an attenuation of the frequencies around 500 - 1.2kHZ, but the test with no
wall and mic at 5 ft. suggests that the amp is not that bad and it's the nearby
wall that is actually pumping up the 500 - 1.2kHZ frequency region. Looking
at the wavelength of those frequencies (6 inches to 2 feet), I think it's believable.
Those frequencies can be effectively attenuated somewhat by turning up the lower
and upper midrange tone controls a bit.

Tone controls set by ear to sound better
with strat (close mic'd).
I'm not sure what caused the notch at about
2kHZ, but since that's above the highest note on the guitar (somewhere around
1kHZ), I'm not real worried about it. Could be internal cabinet reflections,
or the speaker drivers themselves.
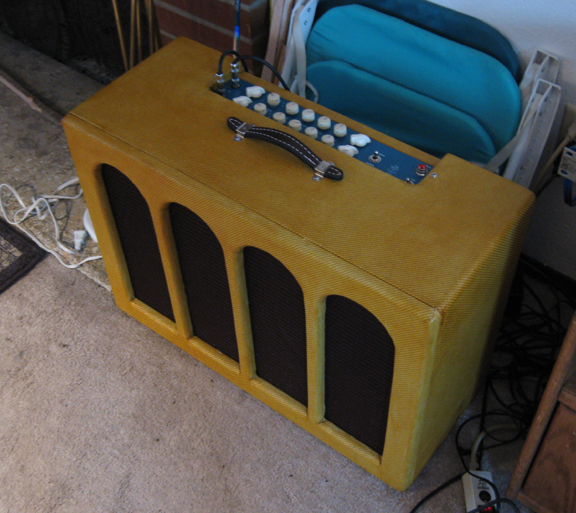
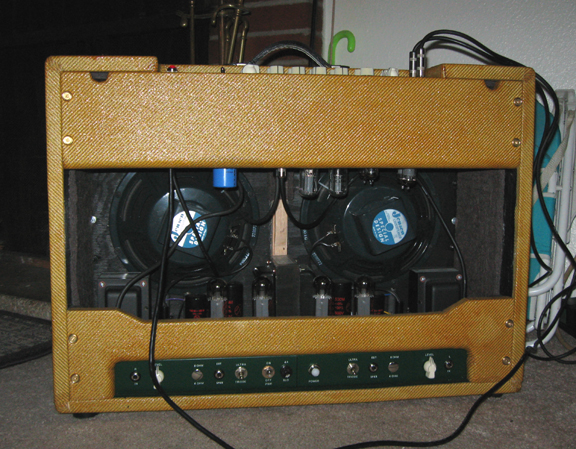
I tried to have an "Old World Deco"
look.
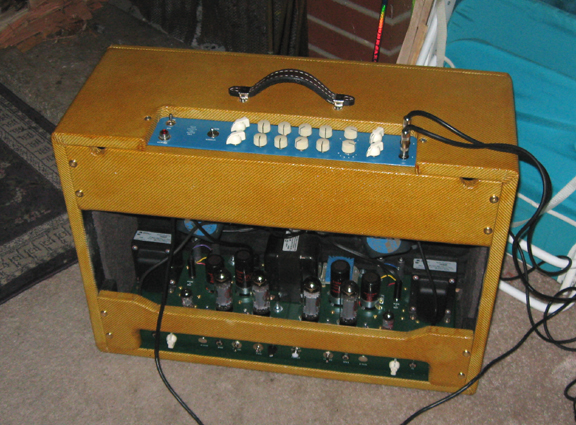
Poweramp in the bottom, preamp in the
top. 35 watts per channel, goes plenty loud, even outdoors.
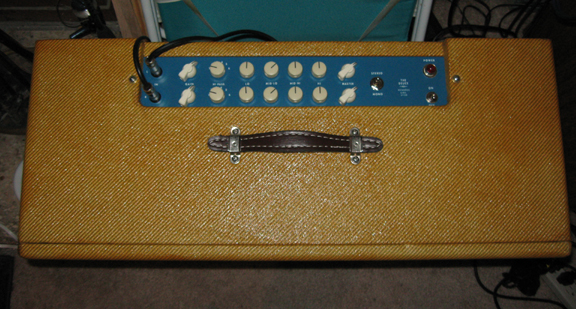
A musician wants an amp that is intuitive,
easy to adjust, and doesn't distract him or her away from the creative part
of their brain.
Many amps have such cluttered front panels,
that it can be frustrating to figure out what you're trying to change and how.
Especially in a dark jam room.
Achieving that on a stereo amp is more
challenging, which is why I left all special effects tot he pedal board.
When in Stereo mode, I set all knobs
the same between the two channels. In Mono mode, only the upper row of knobs
is active.
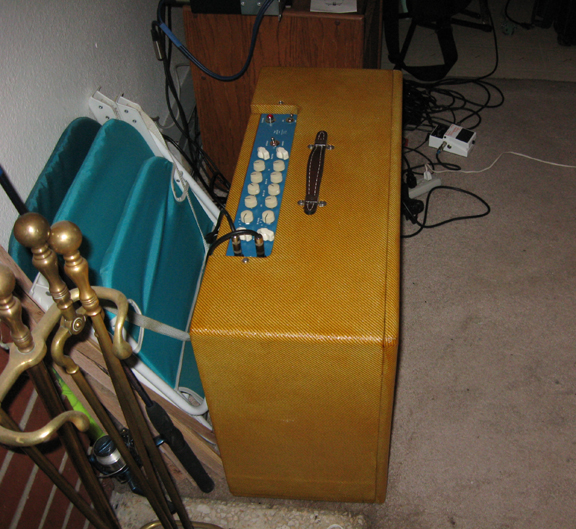
Many mono guitar amps have two input
jacks feeding a passive mixer circuit, before the first tube.
In the earliest days of guitar amps,
it was assumed that you might want to plug a mic or second guitar into the additional
input jack.
Who does that anymore? That passive mixer,
because of the necessarily high value resistors, add hiss noise. I don't do
that.
I feel pretty good about what I ended
up with. The distortion is bubbly and thick but not whimpy. Not at all fingernails
on the blackboard like many amps I've heard (most transistor amps and some tube
amps). It has lots of "bluesy" charactor. It makes you feel good.
It's probably the best sounding amp I've ever played through. It also sounds
exceptional when adjusted for no distortion and used with either an electric
guitar or an acoustic guitar. Every guitar has it's own frequency response "signiture".
They vary a lot. You want to have the tone control flexibility to bring out
the best in any instrument, whatever that is.
Warning to amp
builders:
It's been very labor intensive to build
(all point to point wiring), and parts alone were about $1500. Also, despite
a strong effort to keep the weight down, it ended up being 68 lbs (Eric Clapton's
'57 Fender Twinamp e-type reissue is spec'd at 52lbs). I had decided to just
go buy a Fender Blues Deville for around $700, until I went and played through
one. It was very bright and just not pleasant to listen
to. I felt that I decided to research, design and build the amp I've
always wanted to have. I couldn't resist the challenge. I knew I could whoop
that annoying sounding Fender amp. This amp sounds WAY better to my ear, not
to mention it's stereo.
UPDATE:
I've since added excelent recessed handles
to the sides of the cabinet, so it's much easier to carry. Also removable optional
wheels to the bottom for when it's practical to wheel it into a gig. I've also
replaced the over sized (60W) and over weight output transoformers with some
more appropriate 40 watt Hammond Hi-Fi trannies, to cut a few pounds off. the
only reason I had used the 60W trannies is cuz I already had them, and didn't
realize how the overall weight was going to add up. I used this amp in a band
for about 5 years, playing lead and rhythm, no problems, and I thought it sounded
MUCH better than the amps the other guitarists had. To be fair, the other amps
were kinda crappy. The cabinet is all solid pine, with all bracing being oak
(oak is heavy but VERY strong). At a distance, the stereo reverb is more immersive.
It's a great amp. My work here is done.
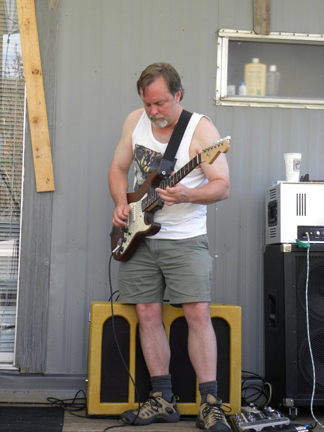
Above, jamming with old highschool buddies
outdoors in the Colorado Mountains.

Above is the band I used this amp in
for about 5 years.


